I was gifted a dusty X60t and remembered how it was one of the more well supported targets for coreboot/libreboot. Thus I decided to take it apart and reflash the BIOS. The following articles explains how this is done. Note, that it is possible to flash the BIOS from a booted Linux install; I decided to do things the hard way.
Disassembly
This guide does a really good job of explaining how to take apart the X60t. I took pictures of before and after to remember where things were placed. The BIOS chip on my motherboard was on the backside so I had to remove it completely from the chassis.
Wiring
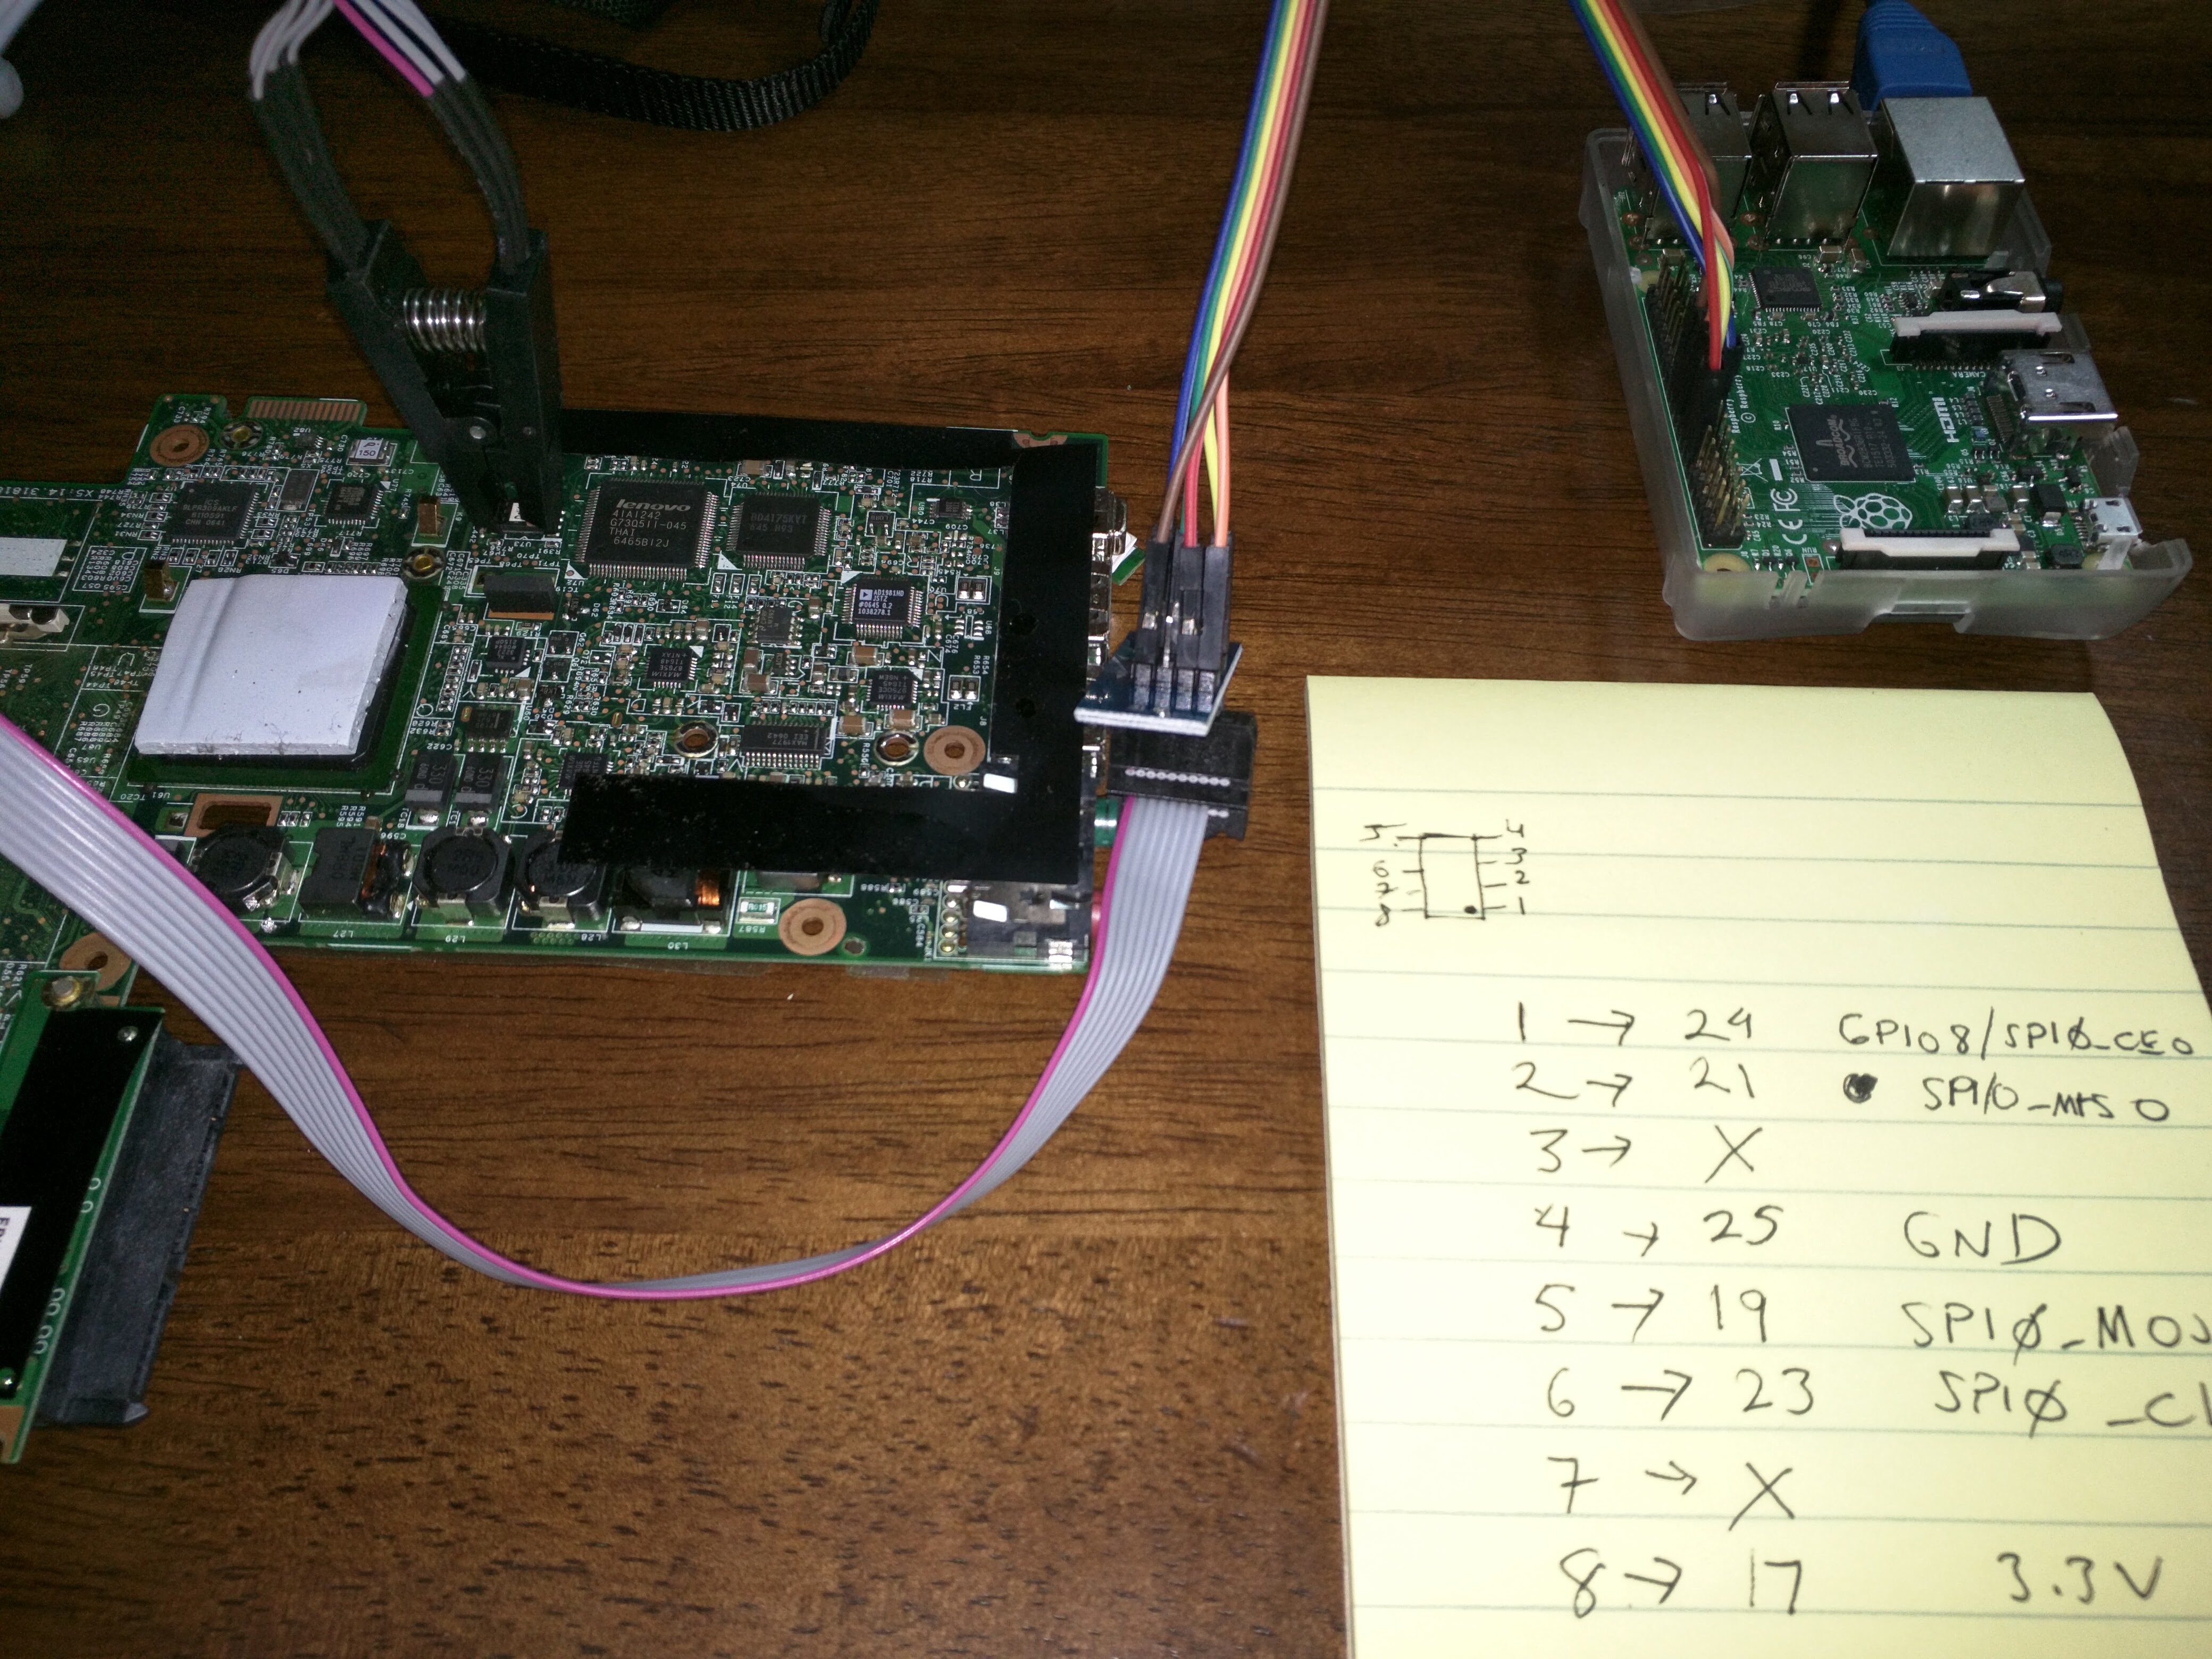
Next, I had to figure out how to wire up my Raspberry PI 2 and the SOIC 8-Pin IC Test Clip. Luckily the clip had a breakout board to make it a bit easier.
Here’s how I wired it:
| SOIC Pin | RPi2 Pin | Description |
|---|---|---|
| 1 | 24 | SPI0_CE0_N |
| 2 | 21 | SPI0_MISO |
| 3 | N.C. | |
| 4 | 25 | Ground |
| 5 | 19 | SPI0_MOSI |
| 6 | 23 | SPI0_CLK |
| 7 | N.C. | |
| 8 | 17 | 3.3V |
Here’s a picture of the RPi2 connected to the clip and cliped onto the BIOS IC.
Software
First, Install Ubuntu/Debian on to your RPi2. Ensure you enable SPI with raspi-config or by ensuring the module is loaded.
Next, install flashrom and get a backup of the existing ROM.
sudo apt-get update
sudo apt-get install -y build-essential pciutils usbutils libpci-dev libusb-1.0-0-dev libftdi1 libftdi-dev zlib1g-dev subversion
svn co svn://flashrom.org/flashrom/trunk flashrom
cd flashrom/ && make -j`nproc`
sudo modprobe spi-bcm2835
sudo modprobe spidev
sudo ./flashrom -p linux_spi:dev=/dev/spidev0.0,spispeed=512 -r factory.bin -V
Run the flashrom read a couple of times and ensure that the factory.bin is consistent by checking its md5sum. If it fails to detect a chip, you may have things wired incorrectly, or the clip may be loose.
Next, extract the VGABIOS. Note, coreboot has a non-blobbed VGA driver, but I was unable to get this working with my device. The following gives more detail about the procedure. In the following, ‘factory.bin’ is the BIOS you’ve just read in the previous step.
git clone http://review.coreboot.org/p/bios_extract.git
cd bios_extract && make
./bios_extract factory.bin
romheaders oprom_0.rom
Flashing
Now that we have the raw parts, we can flash a version of coreboot onto the machine. Initially, I attempted to use libreboot, but couldn’t get a VGA console, nor could I get a serial console. So I decided to download coreboot, determine an appropriate config, compile and flash.
For reference here is the link to the config file I used. More information about building coreboot can be found here.
sudo apt-get install libncurses5-dev
git clone http://review.coreboot.org/p/coreboot
cd coreboot
git submodule update --init --checkout
make menuconfig
util/crossgcc/buildgcc -j`nproc`
make -j`nproc`
If you’d like to include the VGA ROM, you’ll need to copy that file into the coreboot directory. When running menuconfig look for the optional VGA ROM and ensure the filename matches what you have in the directory.
Once the build is complete the rom is located in build/coreboot.rom. You can
take this and flash your device using the following from the RPi2 board:
sudo ./flashrom -p linux_spi:dev=/dev/spidev0.0,spispeed=512 -w coreboot.rom -V
Once this is complete, power off your machine fully and do a cold boot. Eventually you’ll see the SeaBIOS screen and be able to boot into your selected device. If you need to troubleshoot early boot, you can hook up a serial cable to your machine and see if you can see any error messages there.
Results
I was able to install Ubuntu Xenial on the x60t without issues. There was some issue with the digitizer, but a few kernel patches backported to v4.4 fixed the issue for me.