My daughter had a great idea one afternoon. She said it would be really cool to take a picture of a plant growing every day and then see what happens. Maybe she was inspired by a video she saw at school. Regardless, I took up the challenge and we embarked on this project together.
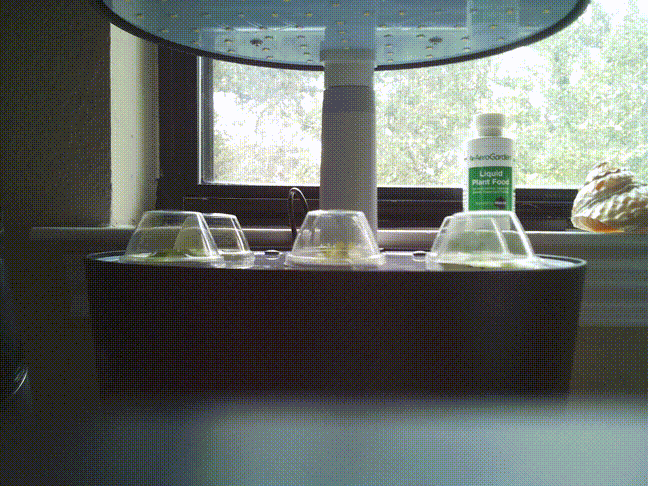
For her part she set up a planter that has a water circulation and light system. Once this was set up and the seed pods were ready, I brought out my trusty Raspberry Pi Model 3.
I also have a camera attached to the device and a case so it was easy to set up. The hardware looks as follows.
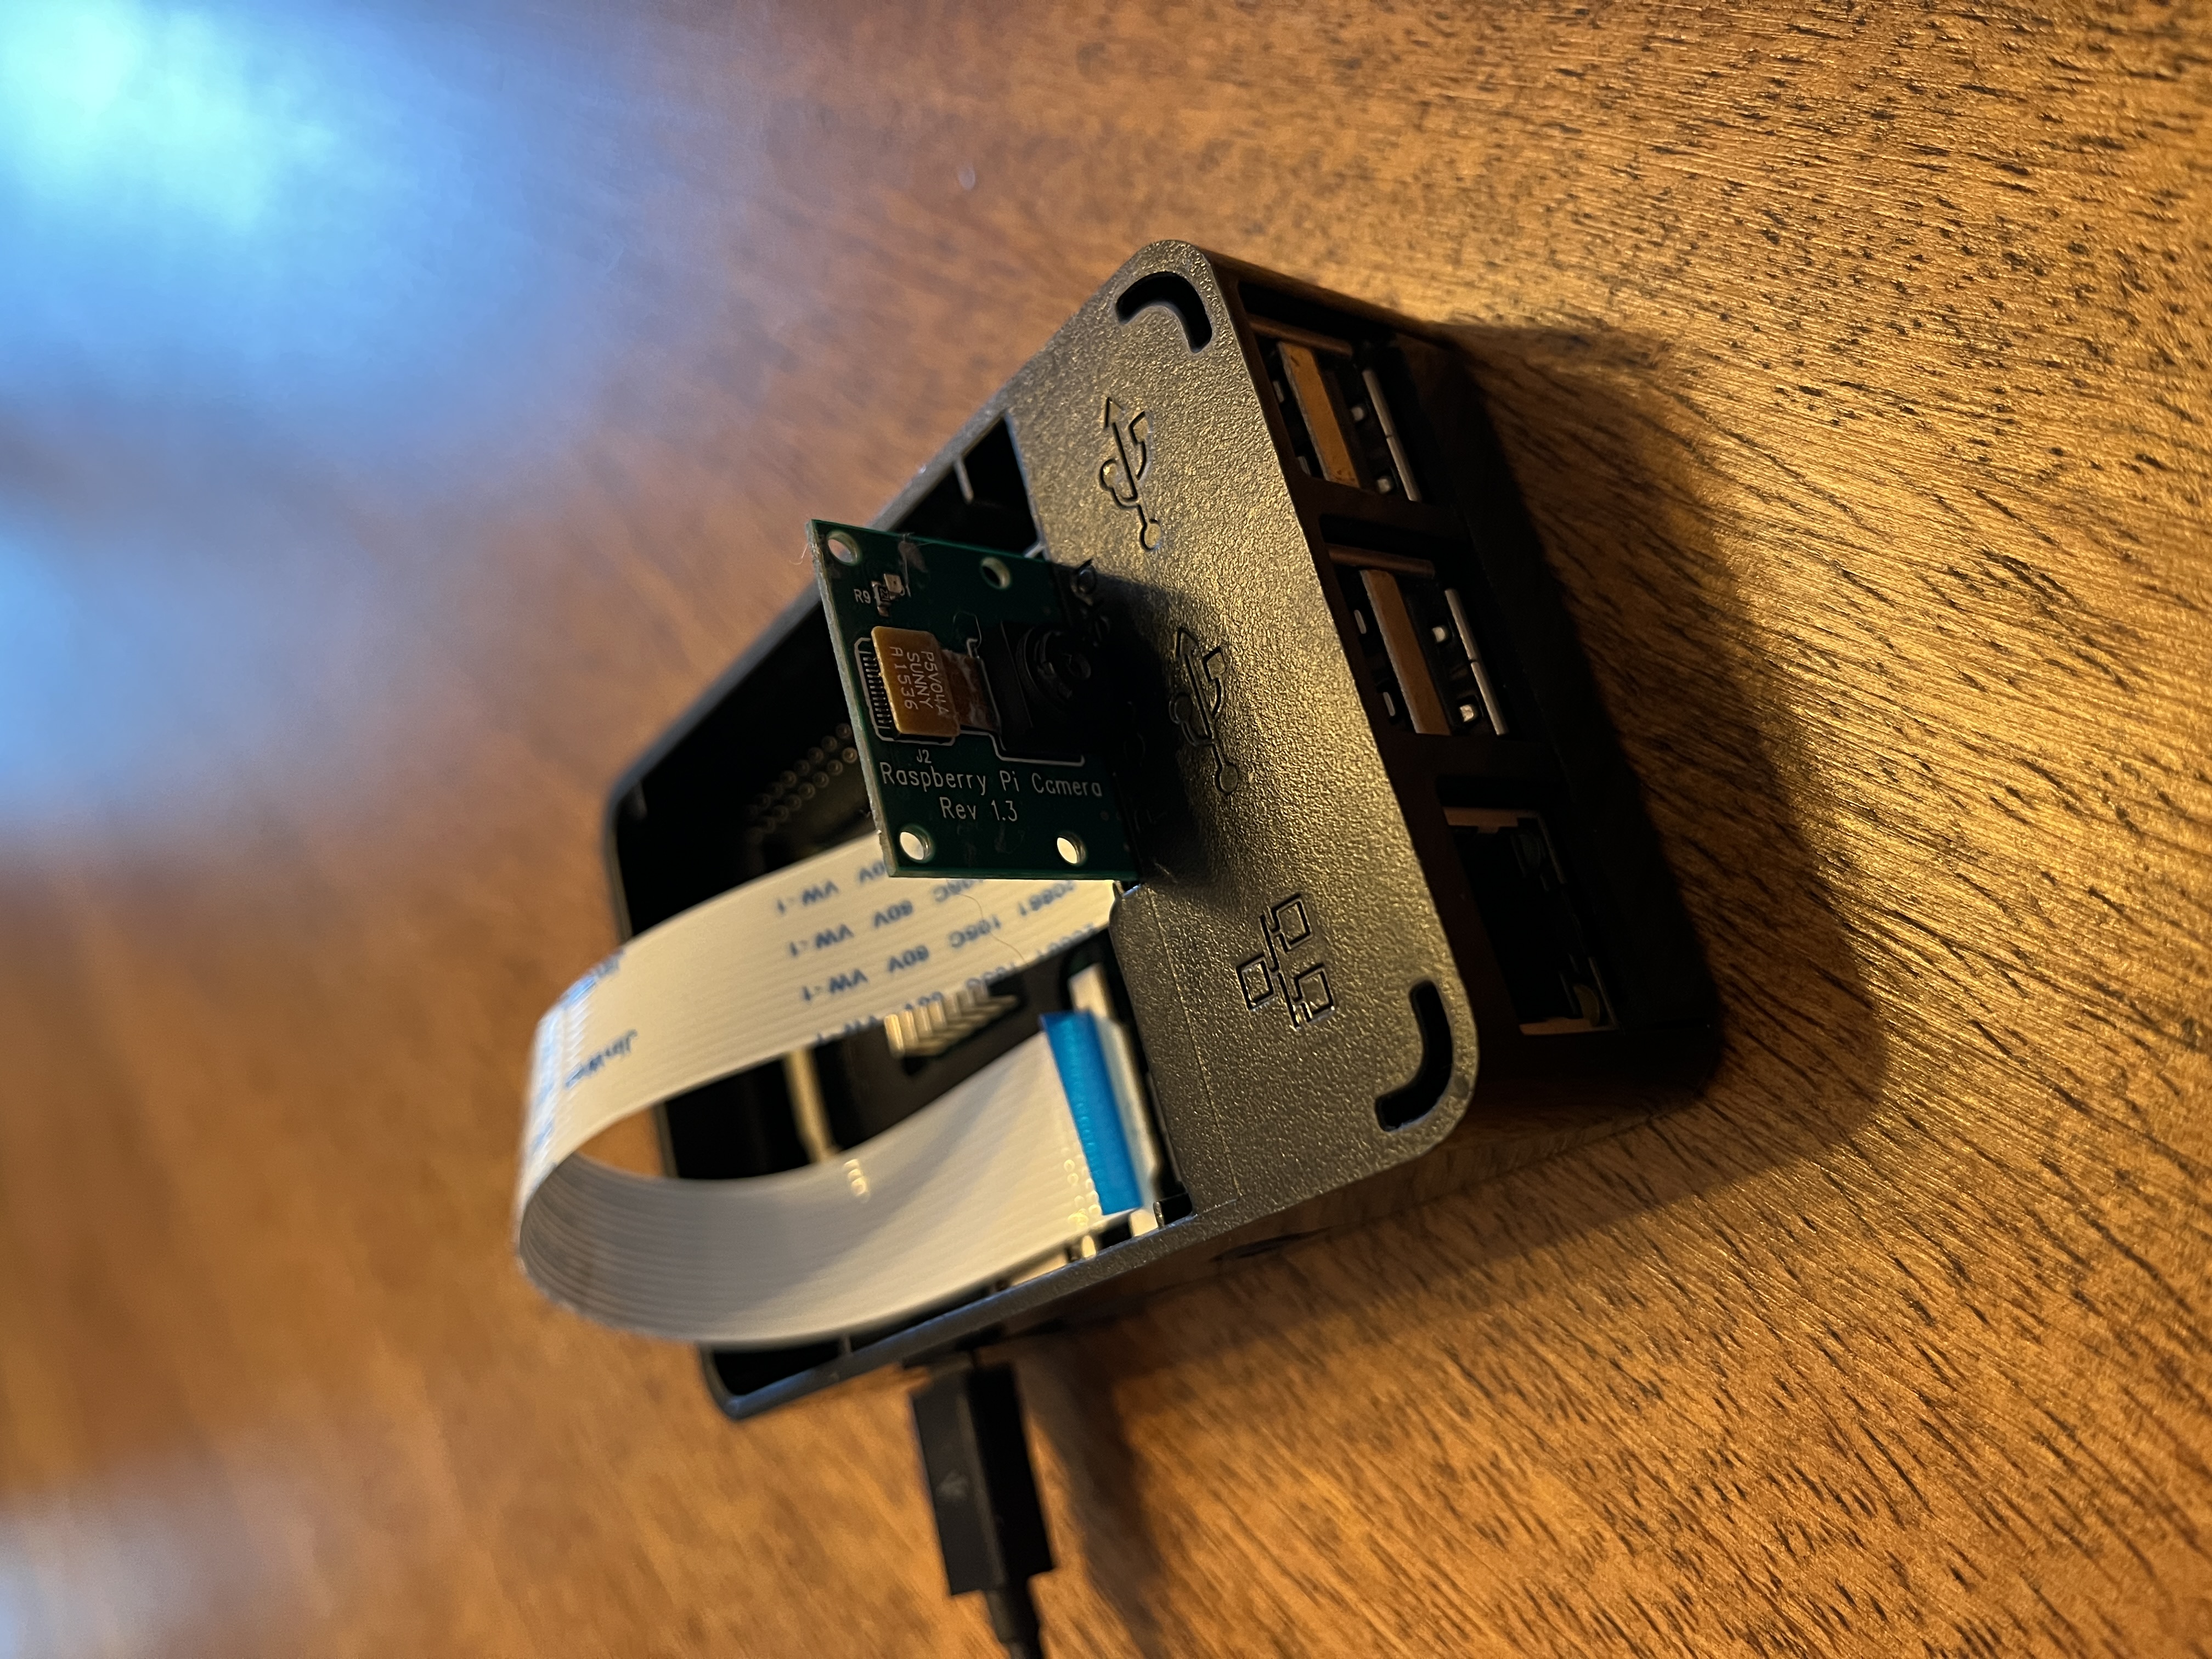
Once I had that set up, I needed to set up the operating system. Originally I tried a 64-bit Ubuntu install, but was having a difficult time getting the camera to work. Instead of installed the latest stable 32-bit Raspbian install.
After that I used libcamera-jpeg to ensure I was able to take a picture. Once
that was in place, I set up a cron job to take a picture and save it to the
root directory with an appropriate timestamp. Initially I had opted for daily,
but I wanted to get feedback sooner if things were working so I opted for
hourly.
In order to do this I simply added a file here: /etc/cron.hourly/capture
#!/bin/sh
/usr/bin/libcamera-jpeg -v 0 -o /root/`date +%Y%m%d%H%M`.jpg
I also wanted to check in on the picutres it was capturing so I set up a basic python web server to see the files.
[Unit]
Description=Serve Files from Root

[Service]
Type=simple
WorkingDirectory=/root
ExecStart=/usr/bin/python -m http.server --directory /root 8000
Restart=on-abort

[Install]
WantedBy=multi-user.target
After this ran for a few weeks it was time to make the timelapse gif. For this ffmpeg worked really well.
apt install ffmpeg
ffmpeg -f image2 -framerate 10 -pattern_type glob -i '*.jpg' -vf scale=648x486 out.gif
Here’s the result: